|
|
Canku Ota |
|
|
(Many Paths) |
||
|
An Online Newsletter Celebrating Native America |
||
|
November 3, 2001 - Issue 48 |
||
|
|
||
|
Craft-Ribbonwork-Part One |
||
|
by Lynne Sageflower Pennington |
|
|
|
|
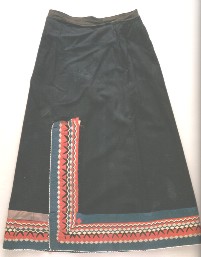
Potawatomi Skirt |
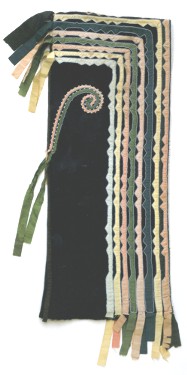
Chippewa Hood |
|
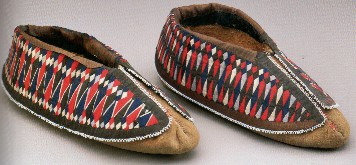
Miami Moccasins, Wabash Indiana, 1820-40 |
|
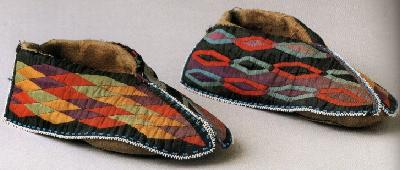
Potawatomi Moccasins, Kansas, 1840-60 |
| The History of Ribbonwork: |
| It is not known exactly when the art of ribbonwork began but it came to become an art of the American Indians
when trading posts were established in the east. A woman could soon purchase or barter for fabric, needles and
other sewing items from the traders. Among the goods sold were also silk taffeta ribbons in brilliant colors and
various widths. The women were soon sewing the ribbons on shirts, skirts, moccasins and the dance regalia they
and their families wore. Soon they learned another way to use the ribbons. Laying then one on top of the other. A woman would then take her newly acquired scissors and cut one half of a geometric design into the ribbon edge. She would then take two other ribbons and cut a mirror image of the design into the other top ribbon she was going to use. Most of the time she would reverse the colors of the top ribbons. But I have seen some ribbonwork in which the top ribbon was the same color. As time went on several variations of ribbon colors were used to make colorful designs. I will talk about these in another section of this article. Once the ribbons were cut she would then put the seams tegether to form the whole design strip. The ribbons were then sewn onto another underlining ribbon set strip or directly to the fabric she was using. As her technique improved she would start cutting patterns for floral and insect designs. To create a pattern the women of the northeast would often use birchbark or other plants to cut out the designs from such as corn husks. When this art came to the Plains via migration or intermarriages the plains women would use whatever form of paper that was around such as flour sacks, potato sack, etc. Due to the frailness of the ribbons very few pieces from before the 1800's are found in museums around the world. |
| What is Ribbonwork? |
| Ribbonwork is a form of reverse appliqué. This type of appliqué is created by placing cut out ribbons on a background fabric. Two or more layers of ribbons are used. The ribbons take on a positive/negative mirror image. Ribbonwork reminds me of inlay work I have seen done with leather. |
| Terms used in Ribbonwork: |
|
| What kind of ribbons are used today? |
| Although some women still use silk taffeta ribbons today because of the variety of materials used to make ribbons
you will find that acetate taffeta ribbon works as good as the old silk ribbon. It has the same values to easily
crease as the silk ribbons does. You can also use cotton ribbons. You will find most of your taffeta ribbons in
any fabric store that has bridal trims or ask the clerk to show you where you will find them. If you find a polyester taffeta ribbon color you want to use I suggest you also purchase a bottle of fraycheck to help with the threads that unravel when you cut the design out of them. You can get fraycheck in most fabric stores. You can however use polyester ribbons as base ribbons since you will not have to cut the design out of them. The best advice I can give it test wash a piece of the ribbon you want to use to make sure it will stand up to washing. If you look at the side of the spool of ribbon you would like to buy, it most likely will state if the ribbon can be washed. Try washing it in a gentle soap like Woolite if it does not state anything. |
| Do I have to use ribbon, can I make it from a piece of material? |
| If you find a color you love in a taffeta or cotton that is not in ribbons, then you can make your own ribbons from the material. Just make sure you have cut straight edges. I found that using a rotary cutter and cutting board helped me to obtain this. |
| What fabric do I use to put my ribbonwork on? |
| You can use most any fabric that you want. The best fabrics to use are cottons or polyester blends such as polyester crepe. If you want to make a ribbonwork dance shawl you want to use a fabric that flows and moves beautifully as you dance. I use polyester crepe even when I am making a fringed dance shawl. |
| Important aspects of ribbonwork. |
| The first one is making sure you use good paper to cut out your designs. You want to be able to use the pattern
over and over again I use card quality paper. I cut a card sheet down the middle then put the two straight edges
together and cut my design from the straight edges. You want to make sure you have a clean straight edge especially
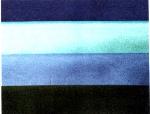
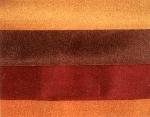
since these edges are the seams you are going to use to put your design you are putting together. When I was researching, about ribbonwork, I came across many designs that used a middle piece to make a design wider to cover more area. To obtain a pattern for this, what I did was take a second piece of card paper, cut it in half and made sure I had even straight edges. Then, cut the design out on one side then reversed the card paper and cut it out on the other side. So in total I had three pieces of card paper. The second aspect that is important deals with color of ribbons. You want to use colorful ribbons that compliment one another. Use colors that are of the same hues but in different colors and that have the same intensiveness, by this I mean the same brightness. Below are examples of combining colors that are shown in the book Scarlet Ribbons by Helen Kelly. |
|
|
|
|

| Now that you have your pattern and colors ready it time to cut out your designs out of the ribbon. The rule of thumb is this: |
| 1. Determine the width of your finished pattern strip and then add 1 inch to allow for mistakes or if you decide
to do something different. Also add another ½ inch. 2. Make sure you have enough ribbon to cover the area you want in height and width. If you want to hang over a little on each side that is ok because you can cut it off after. 3. Use a pencil to mark your design on your ribbon and then use ruler to make sure you have everything aligned ok. 4. Cut the ribbon on the cross grain. Some ribbons tend to fray if not cut on the cross grain. After everything is ready its time to start putting it all together. Personally I prefer to base stitch my bottom ribbon to the material first. You can use a fusible interlining but make sure the under fabric will not become damaged. |
| I am going to end this article here, in the next issue I will get into the different styles of Ribbonwork-Plains, Osage and Woodland style plus graphics so you can see how they look. |
|
|
| Resources I used to learn ribbonwork: There are not many books on this art form. |
|
|
|
|
|
||
|
|
||
|
|
||
|
|
||
| Canku Ota is a free Newsletter celebrating Native America, its traditions and accomplishments . We do not provide subscriber or visitor names to anyone. Some articles presented in Canku Ota may contain copyright material. We have received appropriate permissions for republishing any articles. Material appearing here is distributed without profit or monetary gain to those who have expressed an interest. This is in accordance with Title 17 U.S.C. section 107. | ||
|
Canku Ota is a copyright © 2000, 2001 of Vicki Lockard and Paul Barry. |
||
|
|
|
|
|
The "Canku Ota - A Newsletter Celebrating Native America" web site and its design is the |
||
|
Copyright © 1999, 2000, 2001 of Paul C. Barry. |
||
|
All Rights Reserved. |
||