|
|
Canku Ota |
|
|
(Many Paths) |
||
|
An Online Newsletter Celebrating Native America |
||
|
March 24, 2001 - Issue 32 |
||
|
|
||
|
Beading Series-Part 3 |
||
|
by Lynne Sageflower Pennington |
||
|
|
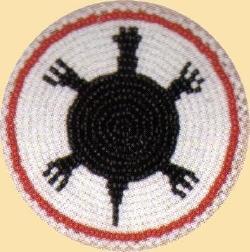
| This is the third installment of the beading series, the technique I will be talking about
is Rosettes. Rosettes can be used to adorn clothing, hair decorations and dance regalia. You can have different
shaped rosettes. Some are round, oval, a centerpiece with extensions on the sides and some are other geometrical
shapes. There are different ways to make and bead them, below I have given a three of the ways that I have found
to be the easiest and fastest for beading them. The size of the rosette depends on the project you are doing. Some Advice: Before doing any beading project make sure you are using uniform beads (beads that are the same shape and form). The ones you buy in Craft stores are not always uniform in size when you purchase them in the bags. However some craft stores carry beads that are in the tube, these most likely are uniform size beads. The best bead sizes to use are, 11, 12, and 13. It is best to purchase these size beads from Beading catalogs or Trading Posts. When I am working on a project in which I need to make several rosettes I purchase several hanks at one time, this way I am assured all my colors are the same shade. Rosette Techniques If you are making a rosette for the first time I advise you to follow the first technique on a separate piece of material or leather until you get use to making them. The First Technique: |
 |
 |
 |
Second round
Third round
The Second Technique: |
||
|
|
The Third Technique: |
|
|
Beading the Edge Picot edging:
Scalloped Edging:
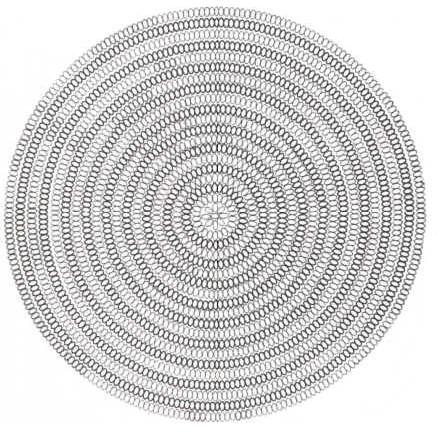
There are several other ways of edging your rosette. If you want to create your own design it is best to work it out on rosette graphic paper so you will be able to know how many beads you need to string of the colors of the design. There are not many sites on the web that teach how to make rosettes. The only blank pattern making graphic I found used squares so I searched for one using rounded beads. I friend sent one to me awhile back. |
|
Rosette Graph Paper-You can print this and enlarge it later |
|
|
|
Web Links- I could not find web sites mainly of this Technique but I found web site on the beading methods |
|
Native American Beadwork: Modern
Techniques |
|
Graph Paper- Aunt Molly has it divided into sections it may be easier to use for you. |
|
Aunt Molly's BeadStreet |
|
Books
Books by Design Originals
|
|
|
||
|
|
||
|
|
||
| Canku Ota is a free Newsletter celebrating Native America, its traditions and accomplishments . We do not provide subscriber or visitor names to anyone. Some articles presented in Canku Ota may contain copyright material. We have received appropriate permissions for republishing any articles. Material appearing here is distributed without profit or monetary gain to those who have expressed an interest. This is in accordance with Title 17 U.S.C. section 107. | ||
|
Canku Ota is a copyright © 2000, 2001 of Vicki Lockard and Paul Barry. |
||
|
|
The "Canku Ota - A Newsletter Celebrating Native America" web site and its design is the |
|
|
Copyright © 1999, 2000, 2001 of Paul C. Barry. |
||
|
All Rights Reserved. |